More and more, we’re finding that our customers’ heads are in the clouds–at least when it comes to managing their Autodesk licenses.
As a safe, secure way to store and access large amounts of data, it’s no wonder that Autodesk Cloud has become a popular licensing platform for many License Statistics users. With support for monitoring Autodesk Cloud license usage, License Statistics is keeping pace with today’s license monitoring needs.
If you’re ready to get monitoring and reporting going for your Autodesk Cloud license server usage, this article is for you!
What you’ll need
- Your Autodesk Cloud administrator credentials
You’ll need your Autodesk Cloud administrator credentials to enable remote monitoring that gathers information about your Autodesk Cloud licensed products, number of licenses, and users assigned to the licenses. - License Statistics Agent
To gather usage data for License Statistics reports, you’ll need to install License Statistics Agent on the end-user host machines you want to monitor.
Now that you have what you need, let’s get started setting up your Autodesk Cloud license server for monitoring and reporting in License Statistics. We’ll break down the process into a few simple steps, which are all done using the license server setup wizard in the License Statistics UI:
- Add a new Autodesk license server or edit one you’ve already added
- Enable remote monitoring
- Enable end-user monitoring using License Statistics Agent
Add a new Autodesk license server or edit one you’ve already added
To begin, you can either add the Autodesk license server to License Statistics or edit an Autocad license server you’ve already added to License Statistics. (If you aren’t familiar with adding and editing license servers, see License Statistics help for complete instructions.)
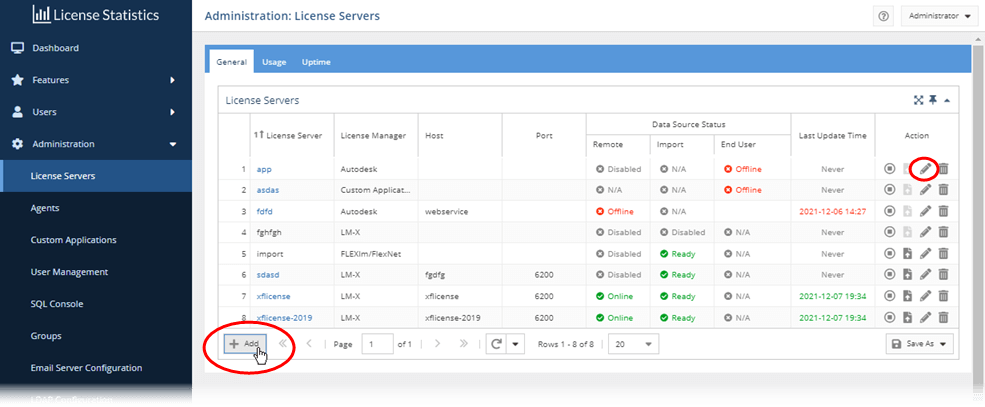
- Open License Statistics, and go to Administration > License Servers.
- If you’ve already added the Autodesk license server for monitoring, click the pencil icon at the end of the row to edit the license server;
Or
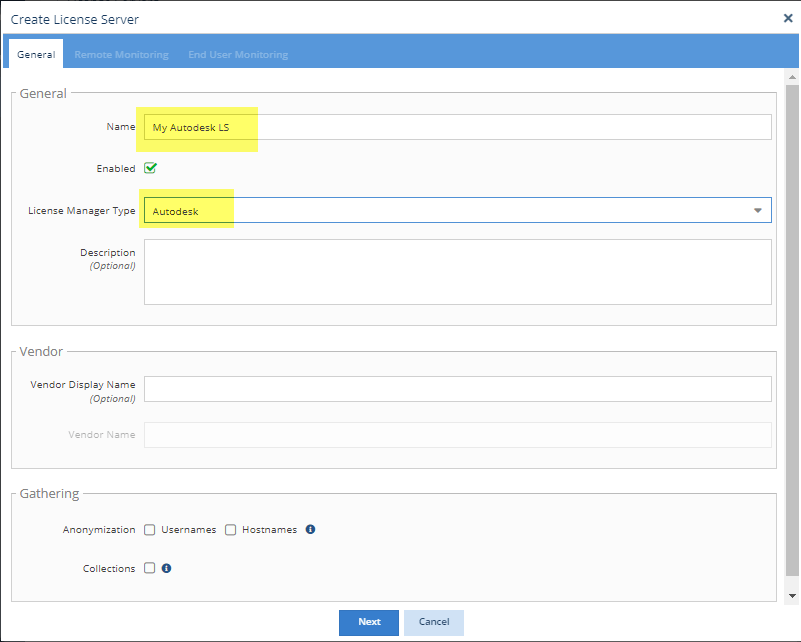
If the license server hasn’t been added to License Statistics yet, click Add to add a new one. - The General tab of the License Server setup dialog lets you define the license server. If you’re adding a new license server, enter (at a minimum) the license server name and select Autodesk as the license server type. The remainder of the entries in the General tab are optional.
- Click Next to go to the Remote Monitoring tab. (The Next button won’t be available until you’ve entered the required information in the General tab.)
Enable remote monitoring
In order to gather information about your Autodesk Cloud licensed products, number of licenses, and users assigned to the licenses, you’ll need to enable remote (HTTP) monitoring for your Autodesk license server.
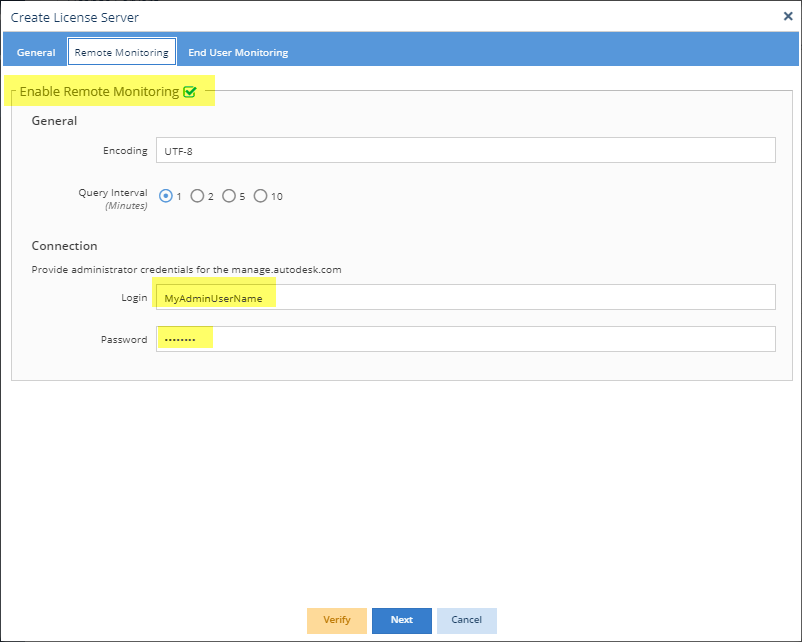
- In the Remote Monitoring tab, toggle on “Enable Remote Monitoring.”
- By default, the query interval is set to 1 minute. You can change this to query the server less often if you like.
- Under “Connection,” enter a valid username and password for your Autodesk Cloud platform (https://manage.autodesk.com) administrator’s account.
- If you want to check that your connection to Autodesk Cloud is working, click Verify at the bottom of the Remote Monitoring tab. However, this step isn’t required; verification happens automatically when you save the license server.
- Click Next to go to the End User Monitoring tab.
Enable end-user monitoring using License Statistics Agent
Now, we’ll enable end-user monitoring using License Statistics Agent groups. If you’re unfamiliar with using groups and want to learn more, see License Statistics help for complete information about creating and managing groups. (You can see a list of all License Statistics Agents in use by reviewing the Agents page, found under the Administration menu.)
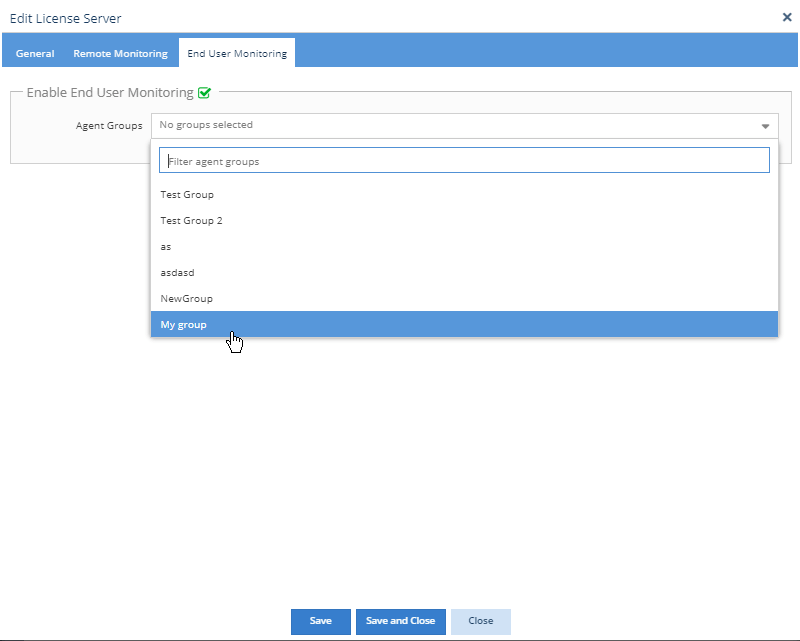
- In the End User Monitoring tab, toggle on “Enable End User Monitoring.”
- From the Agent Groups drop-down, select one or more existing agent groups or add your group(s) on the fly by entering a name in the Agent Groups field.
- Click Save and Close to return to the License Servers page.
And that’s it! Your Autodesk Cloud license server monitoring is complete, and after a minute or so, starts automatically.
The agents monitor Autodesk applications on their hosts, including hostname, username and application name, along with the date the session was started/stopped, and deliver the data to License Statistics. License Statistics takes care of the rest, combining the data from remote monitoring with the data received from the agents and displaying the statistics in its usual easy-to-read grids and reports.
How License Statistics displays cloud users
There may be more than a single matching username on both the host side and the cloud side; for example, a single username (e.g., “administrator”) can use multiple cloud accounts and a single cloud account can be associated with multiple usernames (e.g., “administrator,” “system,” and “jsmith”).
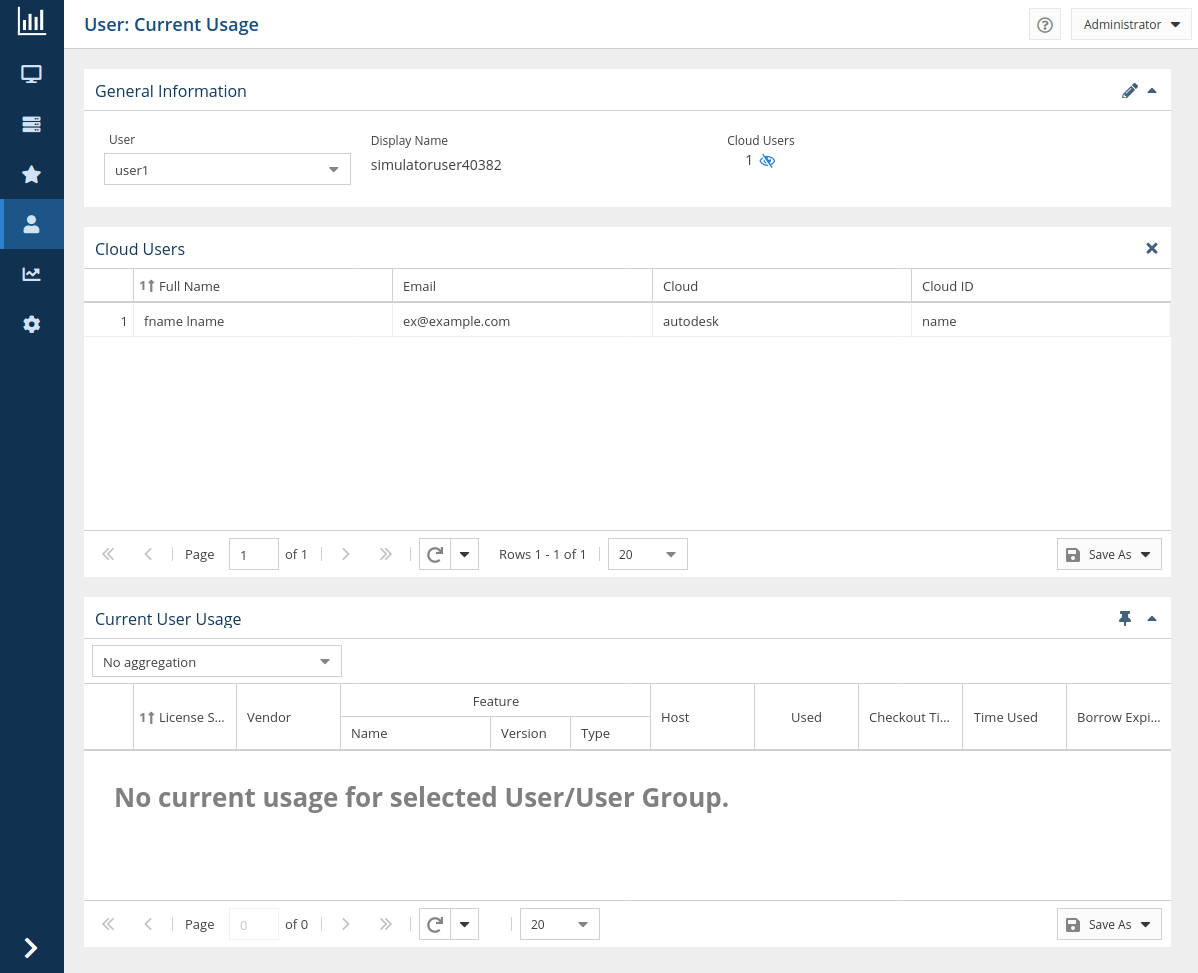
In the User report, you can view the number and details for all cloud users that match usernames on the host for the selected user.
The number of matching users is shown under “Cloud Users” along with a show/hide icon. Click the icon to show/hide the details for the matching users.
When toggled on, a “Cloud Users” grid appears below the General Information area. For example, the following illustration shows details for one matching cloud user.
Get to know License Statistics
Let us know what you think!
We hope this article was helpful in walking you through configuring License Statistics to track your Autodesk Cloud license server usage. You can learn more by visiting the License Statistics page, and as always, feel free to contact us at support@x-formation.com with your questions or comments.
